How to make a custom minicomics box
Here’s a bit of an arts-and-crafts project. A while ago I posted photos of a box I made, in the style of a standard comics longbox, but sized down for minicomics:
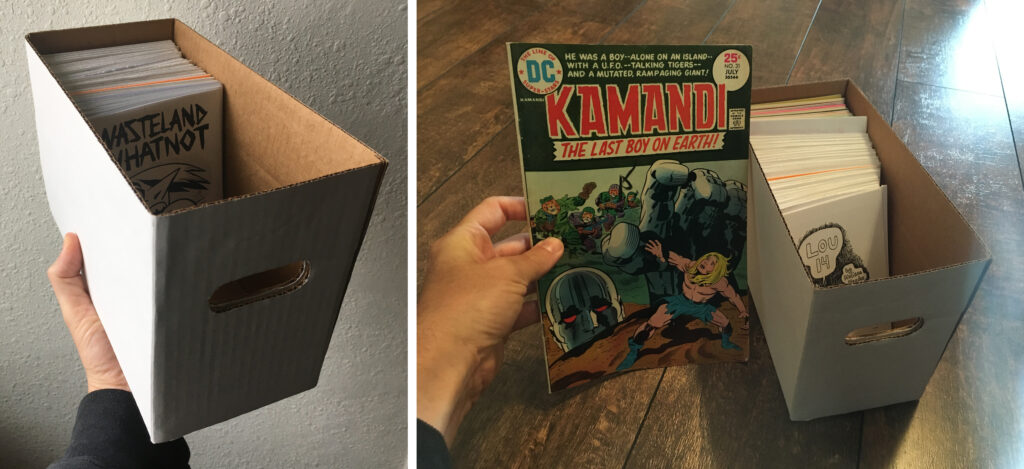
I got a few requests for a how-to so that people could make their own custom-sized minicomics boxes. Here goes.
The first thing to figure out are your dimensions. I decided to make this box to hold the inventory of my own recent work, which are all classic quarter-page sized minis, 4.25″ x 5.5″.
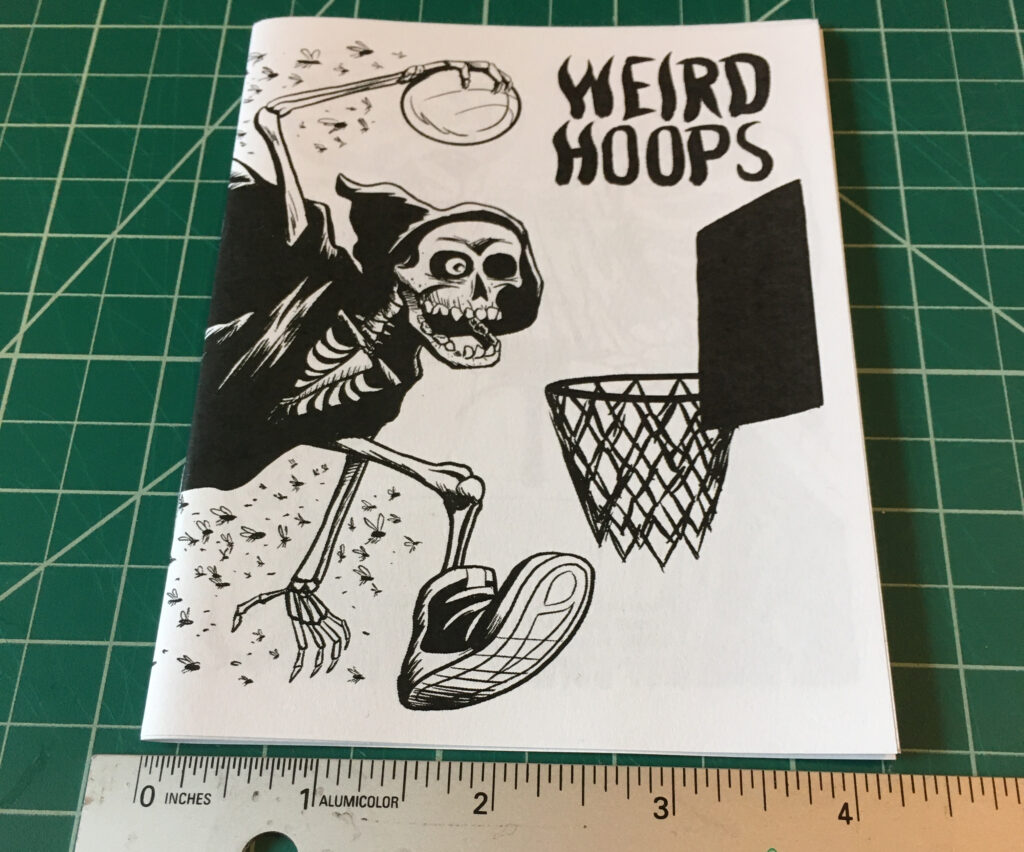
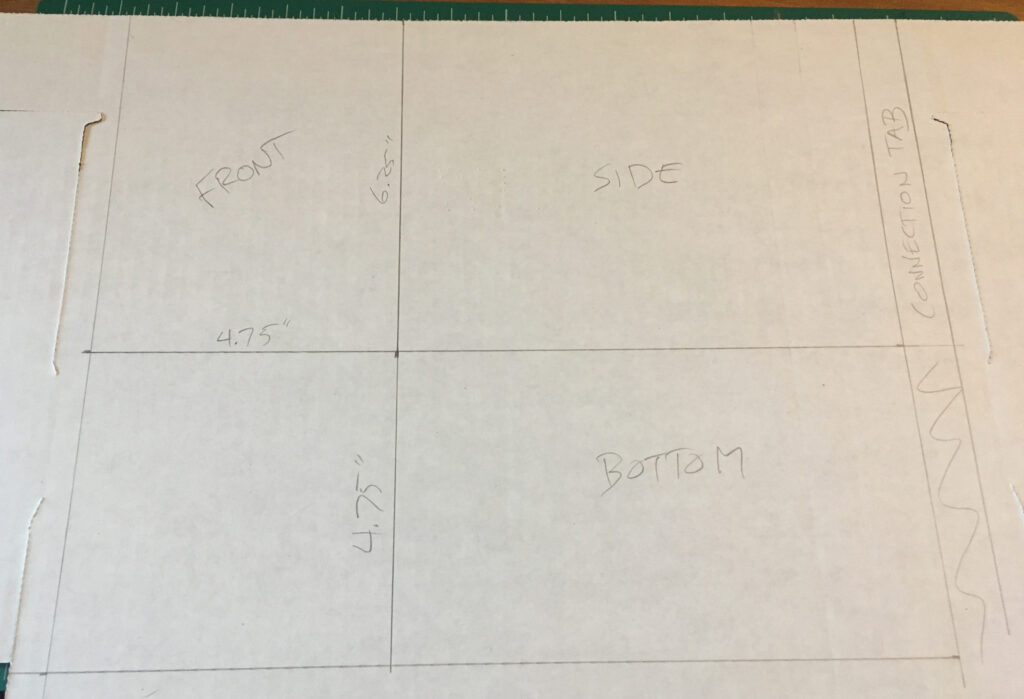
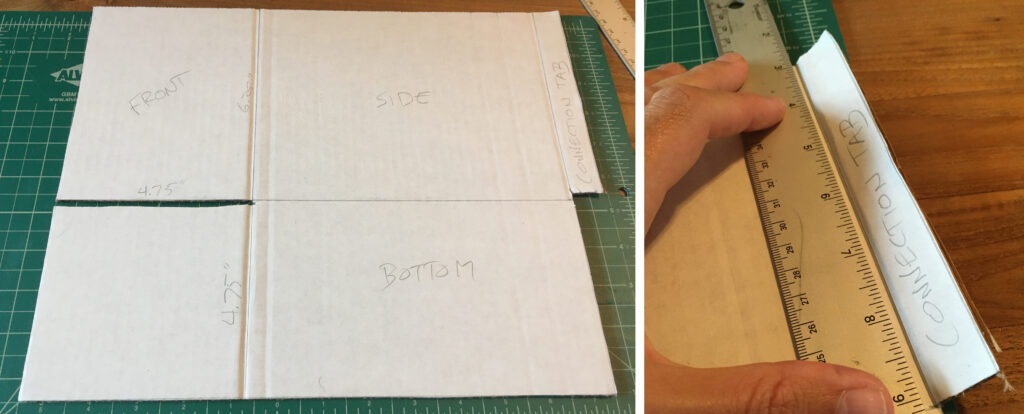
You need some wiggle room so as not to cram the comics in too tight. Comics gotta breathe. I settled on 4.75″ wide by 6.25″ high by however long fit on the piece of cardboard I used. I had some perfect-looking cardboard that was supposed to be a box for business cards or something, but you can use whatever. Cannibalizing an actual comics box would probably work. I had to make the box out of two pieces because I didn’t have a large enough piece of cardboard to form the whole thing. Here’s my layout for one of the pieces:
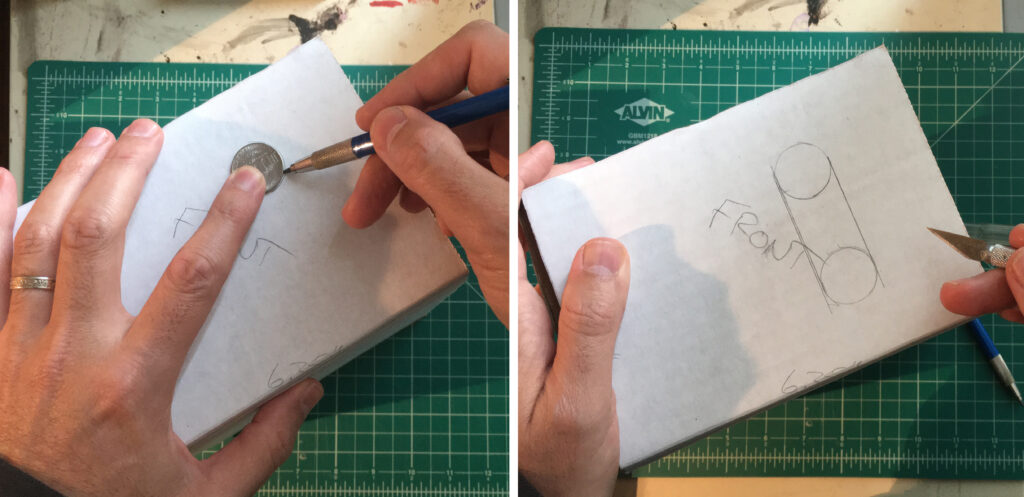
I cut out the shape with an X-Acto knife. Once I’d cut out the first piece I traced it on more cardboard and cut out a second.
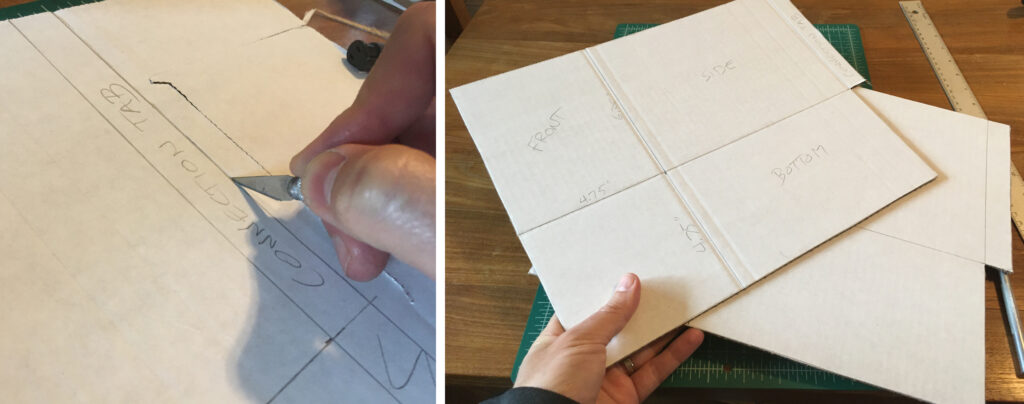
For each piece I cut a groove out below the section labeled “FRONT” and I also cut away a little strip below the connection tab. Then I held a ruler down on each of the pencil lines and folded up, trying and somewhat succeeding to make precise creases. Don’t worry if this isn’t perfect though. Cardboard is a forgiving material. It’ll be fine.
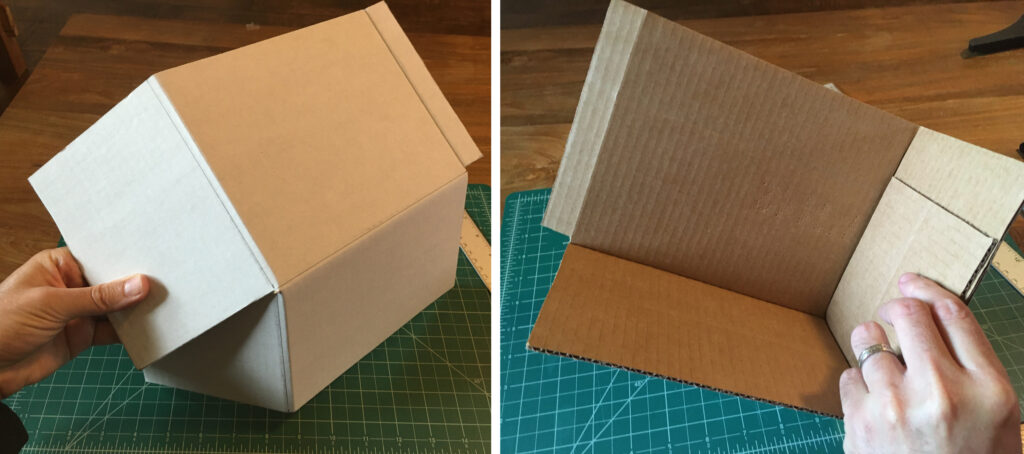
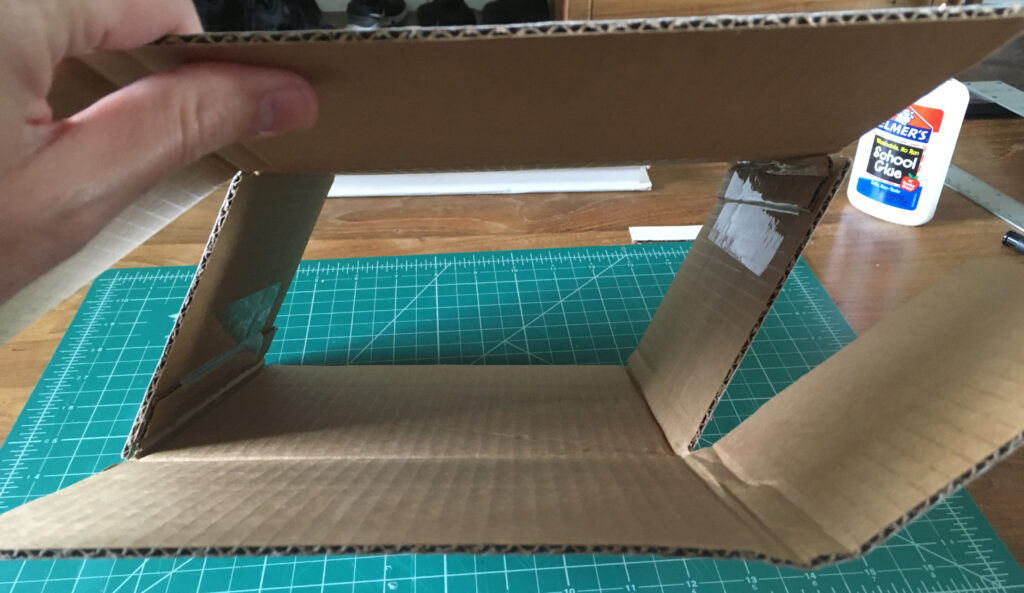
At this point you can get a sense of how each piece is half of the box by squaring the fold between the bottom and the side:
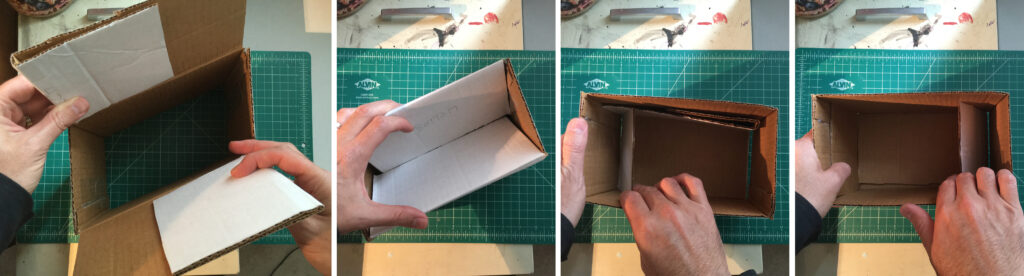
Before I could actually get folding I had to connect the pieces. I placed them side-by-side, put a bead of glue on the connection tab of the left-side piece, and then overlaid the left edge of the right-side piece on it. It’s important to keep this all square. Then I flipped the whole thing over and put a piece a tape along that same joint to reinforce while the glue dried.
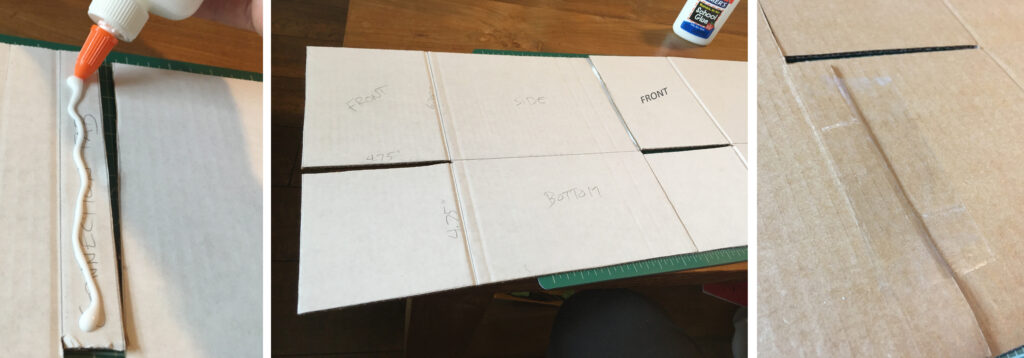
Once that glue dried I folded the now-joined piece in half, right-side out, folded the other connection tab in, and glued it to the opposite end of the full length of cardboard. This second joint makes it so that the sides of the box are now all connected. This is a confusing description but hopefully the pictures help it make sense.
At that point I had an open ended rectangular tube of cardboard, which is what you get when you buy pretty much any flat, unassembled box.
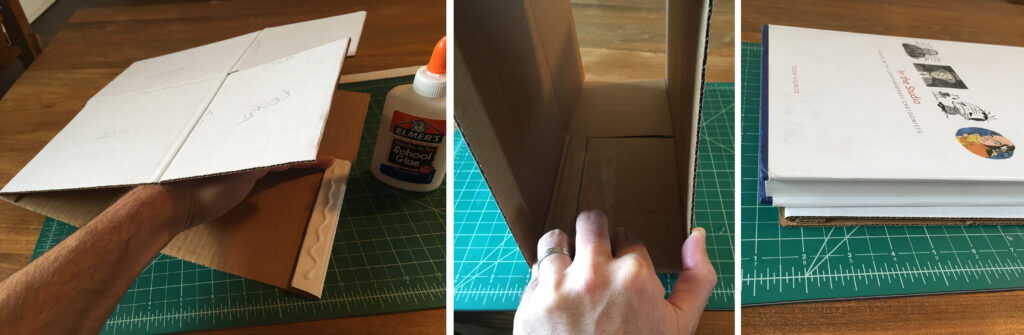
The next part is the standard folding for a comic box: fold the bottom flaps into the box, flip the whole thing right-side up, push one bottom flap down and unfold its side flap up, then do the same thing for the other bottom flap. This part seems like sorcery, but trust me and look at the pictures.
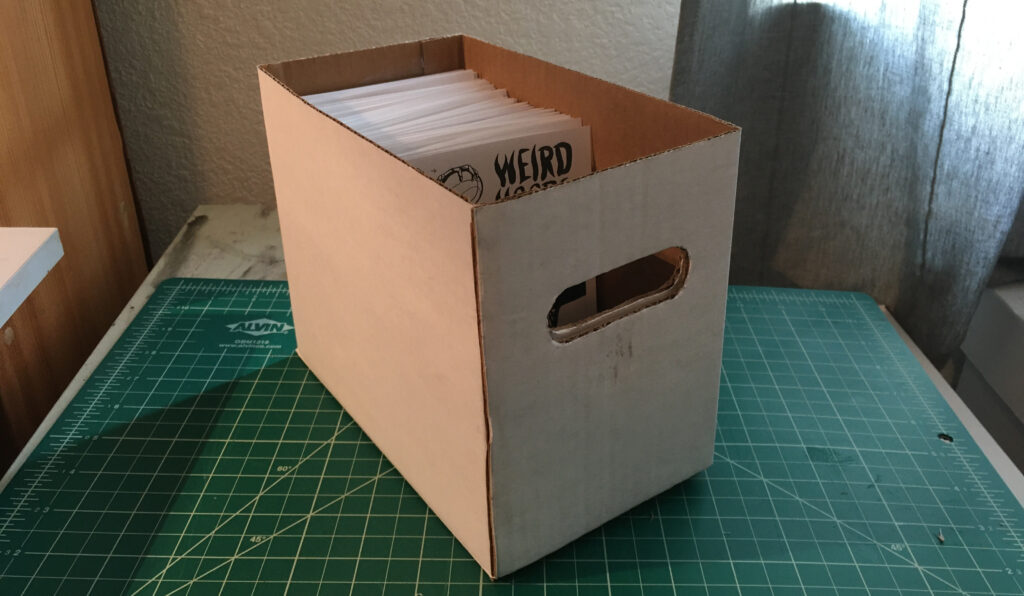
I had to do a little bit of trimming along the edges of those bottom flaps to get them to fit in nicely. Don’t be afraid to adjust generously with scissors. Those flaps will all be inside the box and not too visible, so hack away. At this point I had a perfectly serviceable miniature comics box. But for cuteness’s sake I had to cut out the customary handholds.
And voila!
I’d say even waiting for glue to dry the whole thing took me maybe a couple hours? Alternatively you could keep mini-comics in an empty Cheez-Its box, but isn’t this cooler? ISN’T IT??? I’m not sure??? Anyway, if you end up making your own custom mini-comics storage system I’d love to see it. And hit me up with your questions/concerns.